|
In Unit 8 of Imagine It! students are learning about plants - their parts, needs, life cycle, adaptations, and uses. This blog will include three different activities that allow students to present what they have learned about plants. Each activity encourages students to conduct their own research and work collaboratively to create a finished product using a variety of educational technologies.
Using Text Features with Thinglink
You can introduce Thinglink to your students in a variety of ways.
A fun activity is to have students take a picture of them and a partner and write one thing about them. (ie. My name is Johnny and I am 6 years old). Here is an example of a Thinglink activity to help them get comfortable identifying and labeling pictures using the app.
We all have early finishers who sit and wait patiently. Rather than give them MORE work, a great stretch activity for “high-flyers” could be students drawing their own plant to label and describe or have them research a plant we have not discussed. To complete this task, students would use their own blank piece of paper to draw their own plant. After drawing, they will upload their picture into Thinglink. The students will then label the plant, and add their videos to describe each of the purposes of the plants.
A good way to help struggling students would be allowing students to use a poster or the teacher could already have the name of the plant part on it.
Author's Purpose with MyStory
The stories can be assigned to student small groups through the app Epic!. Be sure to create an account prior to teaching this lesson. To identify the author’s purpose, small groups will use the app MyStory to publish a virtual book describing the various things they learned from each story. This activity will work well in small groups, but feel free to use this lesson in any flex time you may have in your classroom. To snag an already made collection of books about plants for this lesson click here.

To get started using My Story in your classroom, view this brief resource:
A good tip when assigning books in Epic! is to choose one student per small group to be the team captain and then assign the group’s book to that student in order to save time.

Compare and Contrast with PicCollage
The Imagine it! Unit 8: Away we Grow provides students with ample opportunities to learn about various plants and their purpose in our world. For this activity, students will be showcasing what they learned throughout this unit by using their inquiry and researching skills. Engaging students and allowing students to take ownership in their work will make for a fun way to present their learnings for the past 5 weeks.
For the fifth and final week of this unit, students will be diving into the knowledge they have attained while collaborating with a partner. The students will explore either their Imagine It! Stories, Epic!, or search the web to find what they thought was the most fascinating plant. Creating a product is going to be so fun for these students when they use the app PicCollage to create their product.Both partners will choose their own plants, save the picture to the iPad, and let their imagination take them away to describe the differences and similarities between the two different plants. The goal is to use images and information from Google to create a Venn diagram poster on PicCollage.
PicCollage is an app that allows students to create and produce various projects in the classroom. This app is extremely user friendly for your first graders and is such a fun way to allow for them to be creative with technology right at their fingertips.
For help using the PicCollage app, please watch the video below.
Before releasing your students to work in their partnerships make sure to review what students have learned with a KWL chart. Be sure to familiarize students with saving images to their iPads in order to upload them to the PicCollage app. When students are completed with their PicCollage they will upload their poster to Seesaw to be reviewed by the class. If you have not used this wonderful resource in your class prior to this lesson, be sure to create your class on the web.
To access the Seesaw activity click here. 
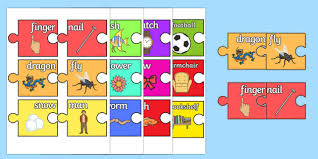
How do I pair up my students for this activity, you ask? To ensure that partnerships are fair, the teacher may want to pair struggling students with self-starters by having students pair themselves with color-coded cards, sticks, etc. One clever way to do this is to create compound word cards and cut them in half. I usually make sure the struggling students get the first part of the word and the self-starters get the end of the compound word. It looks something like this. ↓ Students can choose other topics to compare and contrast or work independently on a Venn diagram. Students can comment on other students’ work on the Seesaw app. Struggling students would benefit from the teacher pre-teaching how to compare and contrast with Venn diagrams by showing them this BrainPopJr. Video. After watching this video, we like to create anchor charts about ANYTHING and EVERYTHING! Dogs vs. Cats! Art vs. P.E.! Doritos vs. Cheetos! Have fun with it!
Standards
ELA RI.8.2, RI.10.1, RI.7.1 Computer Science DL.1.2, DL.2.1, DL.2.2, CS.2.2, NI.1.1, DA.1.1 AuthorsMelissa Duncan
0 Comments
Your comment will be posted after it is approved.
Leave a Reply. |


 RSS Feed
